

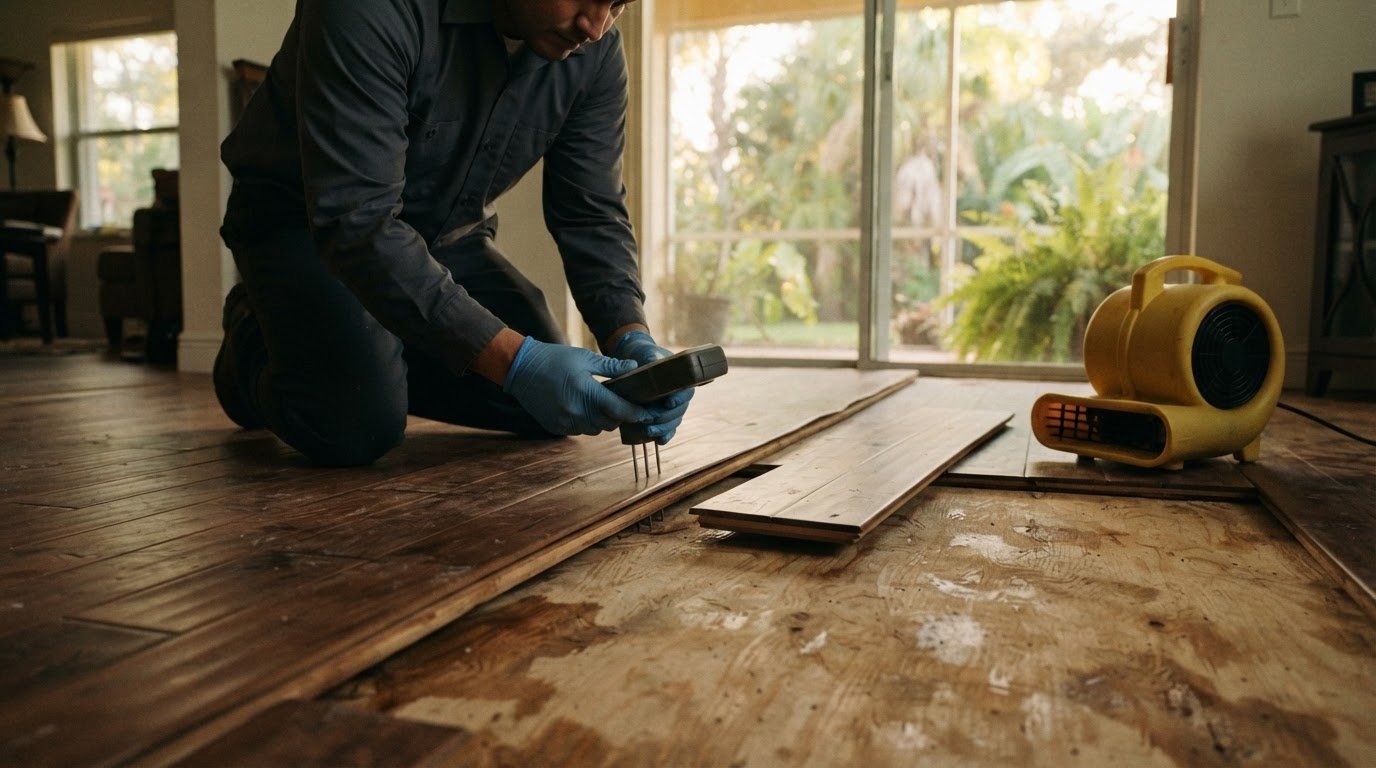
A water-damaged wood floor can often be repaired, but the right solution depends on how far the moisture has spread and whether the boards or subfloor are damaged. For wood floor water damage repair in Plantation, act quickly: mold can begin forming in damp, enclosed spaces within 24-48 hours.
It’s understandable to worry that buckling, cupping, or discoloration means the whole floor must be replaced. Some damage can be addressed after the wood is thoroughly dried; more severe saturation may require replacing affected boards or sections. Sanding too soon can make the problem worse.
This guide explains how to recognize damage as it progresses, what affects repair decisions and insurance coverage, and what you can safely do about early mold. You’ll also learn when professional water remediation and dry-out services can help protect the floor and the home beneath it.
Key Takeaways
- Water-damaged wood floors can often be repaired, but the right approach depends on how deeply moisture has reached the boards and subfloor.
- Drying and moisture checks should come before sanding or refinishing, since working on damp wood can worsen unevenness.
- Repair and coverage decisions depend on factors such as the source of the water, the extent of damage, and the flooring affected.
- The U.S. Environmental Protection Agency says homeowners can usually clean mold in an area under about 10 square feet; larger areas may need professional attention.
- Restoration professionals address water extraction and drying, while flooring contractors focus on repairing or replacing damaged boards after the area is dry.
Can Water-Damaged Wood Floors Be Repaired?
Yes, water-damaged hardwood can often be repaired if the damage is assessed and the structure dries properly. For wood floor water damage repair in Plantation, begin by identifying the water source and checking whether moisture reached the subfloor. Permit requirements depend on the work involved; flooring repairs and work affecting structural components may be treated differently. Confirm which requirements apply to your project before work begins.
-
Extract Water and Clean the Area
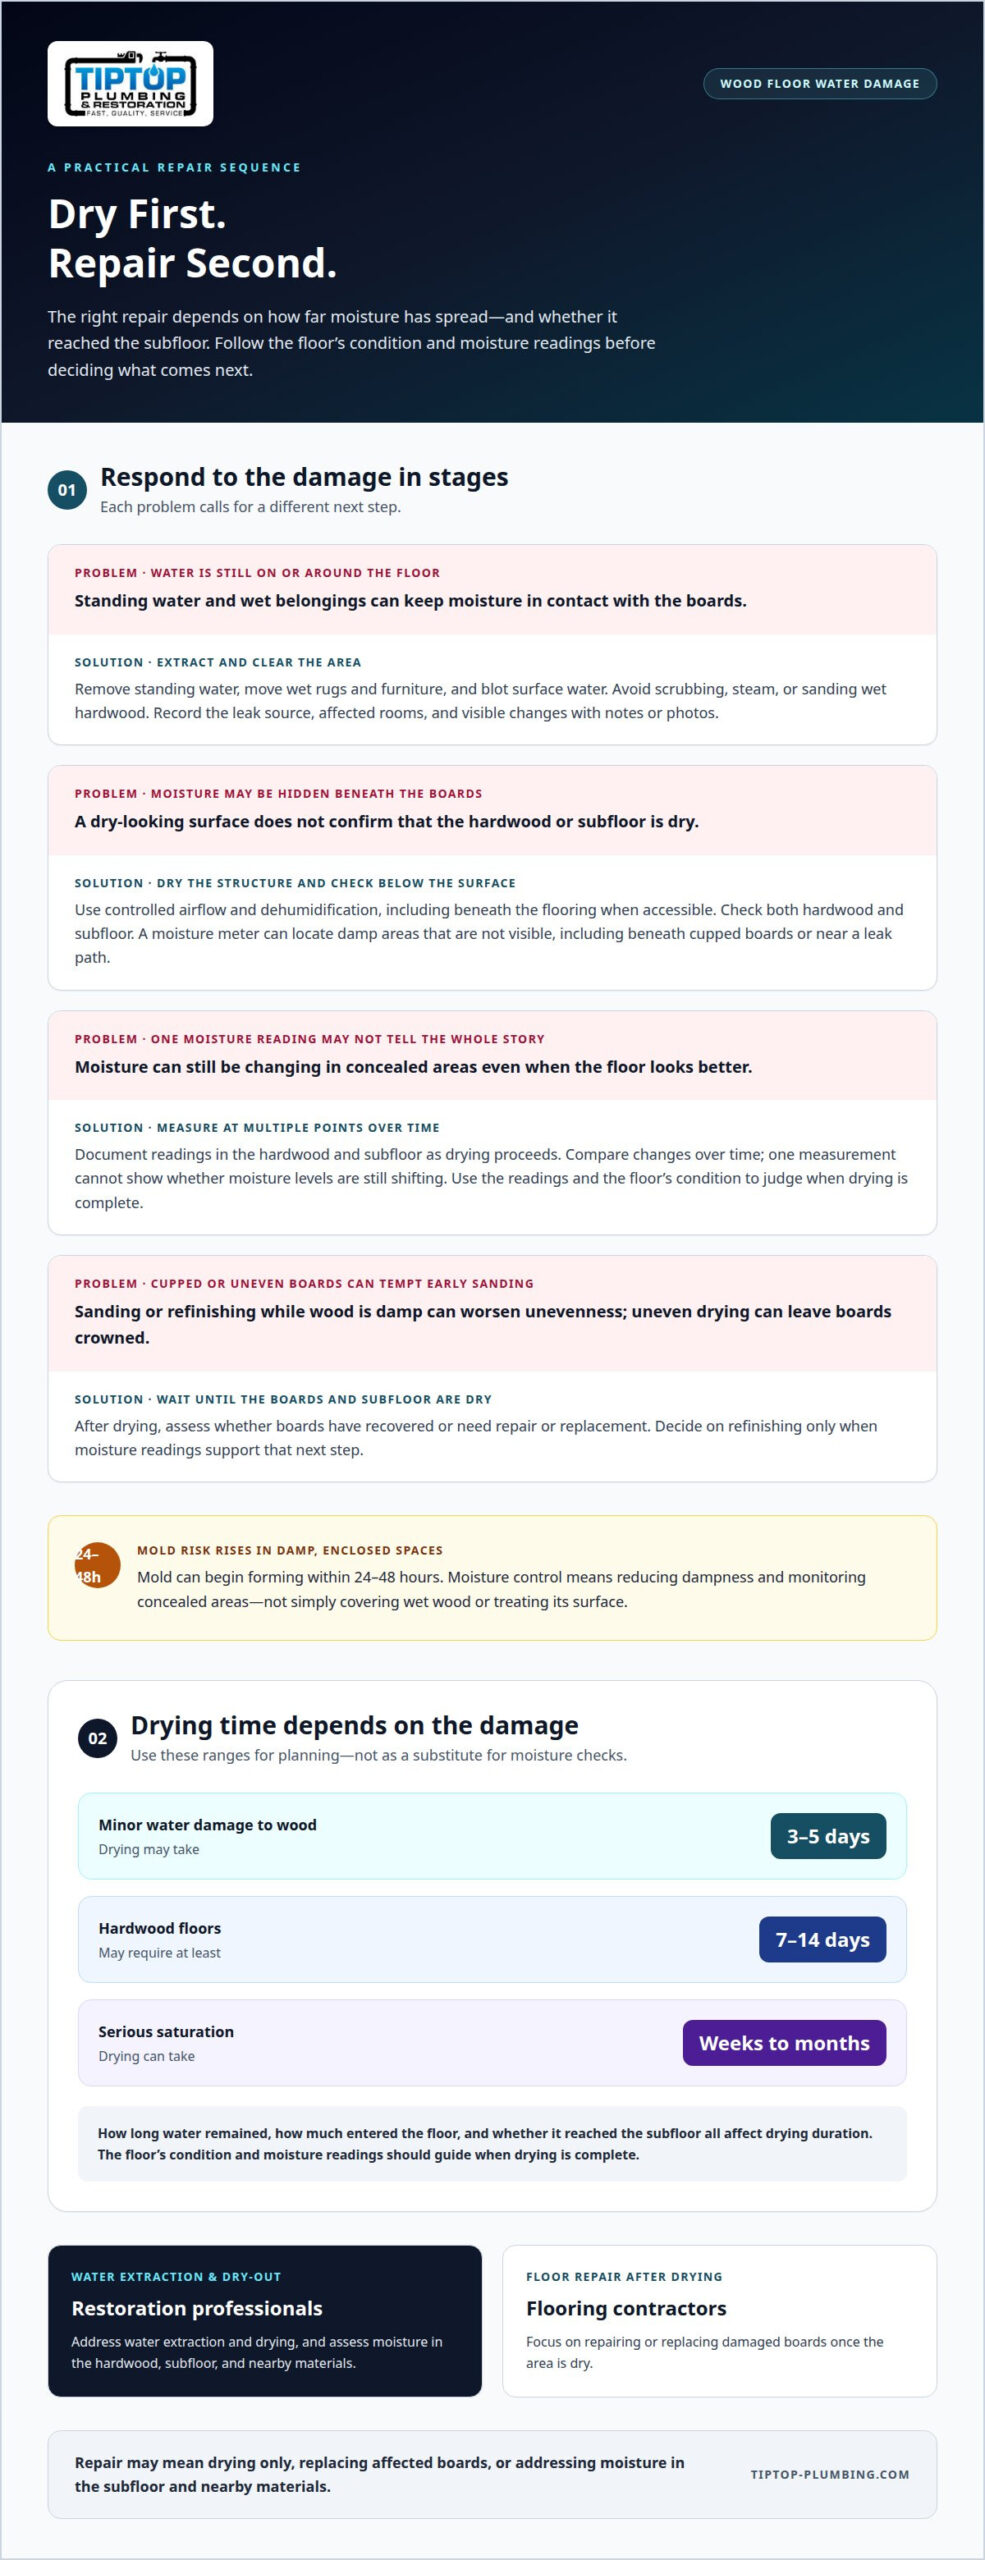
Remove standing water, then move wet rugs, furniture, and debris away from the affected floor. Water extraction limits how much moisture can enter the boards and subfloor. Blot surface water, and avoid scrubbing, steam, or sanding wet hardwood. Document the leak source, affected rooms, and visible changes with notes or photos. Water from a toilet backup, sewer line, or outdoor flooding needs a different response than a clean-water spill.
-
Dry the Structure Under Controlled Conditions
Dry the structure with controlled airflow and dehumidification, including beneath the flooring when accessible. Professionals assess the hardwood, subfloor, and nearby materials, then position equipment to remove moisture without relying on heat alone. The U.S. Environmental Protection Agency says moisture control is key to mold control. Preventing mold means reducing dampness and monitoring concealed areas, not simply covering wet wood or treating its surface.
-
Measure and Monitor Moisture
Measure moisture in both the hardwood and subfloor before deciding that drying is complete. A moisture meter can locate damp areas that aren’t visible, including beneath cupped boards or near a leak path. Take readings at multiple points and document changes over time. One measurement can’t show whether moisture levels are still shifting. Don’t refinish or sand until the floor is dry and readings support that next step.
-
Estimate Structural Drying Duration
Estimate drying time by considering how much water entered the floor, how long it remained, and whether it reached the subfloor. Minor water damage to wood may require 3-5 days of drying, while hardwood floors may require at least 7-14 days. Serious saturation can take weeks to months. These ranges help with planning, but moisture readings and the floor’s condition should guide when drying is complete.
Wait until boards and the subfloor are dry before refinishing. Wet or cupped hardwood shouldn’t be sanded early, because uneven drying can leave boards crowned. After drying, assess whether the boards have recovered or need repair or replacement. For wood floor water damage repair in Plantation, this measured sequence helps distinguish surface distortion from damage that extends into the structure.
Factors affecting repair cost and insurance coverage
Repair scope and insurance decisions depend on the water source, how far moisture traveled, and which materials were affected. Use these steps to organize the assessment and claim information.
- Identify the water source and affected area. Record whether the water came from a plumbing leak, appliance overflow, sewer backup, or flooding, since the cause can affect policy coverage. Note which rooms and materials were affected, including hardwood floors, the subfloor, trim, and nearby walls. Photos of the source and visible damage can help establish what happened and where repairs may be needed.
- Document the damage and drying progress. Photograph warped boards, stains, and damaged edges before cleanup changes their appearance. Keep a timeline of when the leak began, when it stopped, and when drying started. Save relevant receipts and record moisture readings as drying proceeds. Those records help show the floor’s condition and distinguish visible damage from moisture that remains beneath the surface.
- Review homeowners coverage against the cause. Read the policy language on water damage, exclusions, deductibles, and claim limits. A sudden plumbing leak and water entering from outside may be treated differently under a policy. Don’t assume every water-damaged floor is covered. Ask the insurer how the policy applies to the documented source and affected materials, and keep notes of claim communications.
- Separate flood coverage from homeowners coverage. Flood damage may involve a separate policy. Under the NFIP Standard Flood Insurance Policy, coverage for basement items is limited to specified items, and finished flooring is not among them; the policy is identified at 44 CFR Part 61, App. A(1). If a basement floor is affected, distinguish finished flooring from covered items when documenting the claim. Policy terms determine how coverage applies to a particular loss.
- Match the repair scope to the documented damage. The work may involve drying only, replacing damaged boards, or addressing moisture in the subfloor and adjacent materials. Floor type, affected area, extent of saturation, and the presence of mold or rot all influence the scope. Humidity and moisture readings can help show whether the structure is ready for flooring repairs. Share the records with the insurer and arrange a professional assessment to clarify the affected areas and work required.
Cleaning damaged wood and early mold
Clean only after standing water is removed, and avoid adding moisture to already wet hardwood. Check the visible surface and subfloor for signs that water traveled beyond the original spill.
-
Inspect the Subfloor for Water Damage
Look for water paths at board edges, floor vents, and transitions into a bathroom or hallway. A dry-looking surface can conceal moisture below hardwood, especially where a leak has tracked under the flooring. Note soft spots, persistent dampness, discoloration, or a musty smell, then document the affected area. Don’t pry up boards without a clear reason, since that can increase damage and complicate later repairs.
Check the subfloor where it is accessible, including beneath a removable vent cover. Moisture or visible mold there points to a problem beyond surface cleaning. Record where the signs appear and whether they extend beyond the room’s original wet area. That detail helps show whether the source affected adjacent flooring or concealed materials.
-
Clean Damaged Wood
Remove loose dirt with a soft cloth, then clean a small, inconspicuous surface first. For early mold on wood, the cleaning method described here uses one part vinegar with three parts water. Apply the solution lightly rather than soaking the boards, and wipe the area afterward. Excess liquid can seep through seams and keep the subfloor damp.
Avoid steam cleaners on hardwood, because steam adds heat and moisture to the wood. Don’t use acetone to treat discoloration: it may fail to improve the mark and can change the floor’s appearance. If cleaning leaves staining or the boards remain damp, stop before applying stronger treatments. Record what was cleaned and where, so later assessment can distinguish old marks from continuing growth.
-
Address Mold Risks and Remediation
Act quickly in enclosed, damp spaces: mold can begin forming within 24-48 hours. The U.S. Environmental Protection Agency says homeowners can usually clean mold in an area under about 10 square feet. Keep the affected patch within that limited scope; widespread growth or mold returning after cleaning calls for professional remediation and a search for lingering moisture.
Include the subfloor in the assessment if mold appears near seams, a bathroom leak, or a damp room edge. Surface cleaning alone won’t address growth below the boards or moisture that remains trapped underneath. Remediation should address the mold and moisture source together. Otherwise, visible growth may return, even after the wood looks clean.
Keep a simple record of the affected room, visible growth, cleaning method, and any continuing dampness. For example, note whether a patch beside a bathroom doorway returns after the surface dries. That record helps distinguish isolated surface growth from a continuing moisture problem and supports a more complete assessment of the wood and subfloor.
Restoration Company or Flooring Contractor?
Choose help based on whether the main problem is active moisture or damaged flooring. Restoration addresses water and drying; flooring professionals repair or replace boards after the structure is dry.
-
Assess DIY Versus Professional Help
Start with a visual check of the affected boards, nearby transitions, and the room below, if accessible. You can document visible cupping, stains, and the leak’s location, but appearance alone can’t show moisture beneath the floor. Avoid lifting boards or sanding to test the damage. If the floor feels soft, stays damp, or changes after the leak stops, arrange a professional assessment.
Use DIY cleanup only for water you can safely remove without disturbing flooring or concealed materials. For example, blot a small surface spill and move dry belongings away. Don’t assume a dry-looking plank means the subfloor is dry. A professional can assess moisture and the extent of damage before repairs begin.
-
Consult Restoration Professionals
Call restoration professionals while water remains, moisture may be trapped, or drying is incomplete. Their work focuses on water removal, structural drying, and checking affected materials, rather than sanding or matching floor finishes. Dehumidifiers and controlled drying help address moisture beyond the visible boards. Professionals can also document damage and monitor drying progress before repair work proceeds.
Ask for an assessment that distinguishes the hardwood surface from the subfloor and surrounding structure. Water damage may extend past the visibly cupped boards, so treating only the floor finish can leave the source of the problem untouched. Professional water damage work often follows recognized IICRC standards. Complete the restoration phase before planning flooring repairs.
- Bring in a flooring professional after drying. Once moisture readings show the floor is dry, have a flooring professional assess whether boards can be repaired, refinished, or need replacement. They can evaluate cupping, loose boards, finish changes, and how a repair will meet the existing floor. Wet or cupped hardwood shouldn’t be sanded before it dries, because uneven drying can leave boards crowned.
Use the damage pattern to guide the handoff. If drying is complete but several boards remain distorted, a flooring specialist can focus on the wood itself. If moisture is still present below the floor, return to restoration first. Separating these stages prevents premature sanding and keeps structural drying distinct from finish work.
Early signs and progression of water-damaged wood
Leaks, appliance overflows, spills, and outdoor flooding can introduce moisture into wood floors. Look for stains, raised edges, cupping, or loose boards, then trace the pattern toward a likely source.
- Map the first visible changes. Note where stains, dull patches, or raised seams appear, and compare them with nearby doorways, sinks, and appliances. A stain beside a bathroom vanity may suggest a different water path than swelling near a dishwasher. Photograph the floor and nearby furniture before moving items, so you can document the original pattern and affected area.
Check whether the damage forms a small patch or continues across several boards. A concentrated mark may align with a spill, while changes along multiple seams can indicate moisture traveling beneath the surface. Don’t treat color alone as proof that the wood has dried; appearance cannot show moisture below the finish.
- Watch how the boards change. Wood absorbs moisture and expands, which can push edges upward or create gaps as conditions change. Cupping means board edges sit higher than their centers; buckling can lift boards more sharply from the floor. These changes may become more obvious after the original leak has stopped, so document new movement rather than assuming the damage is stable.
Pay attention to furniture legs and rugs that may hide changes or restrict airflow. A table sitting over a damp patch can conceal stains, while a rug can keep moisture against the boards. Move belongings carefully, and avoid placing heavy furniture back until the floor’s condition has been assessed.
- Check whether the wood has lost strength. Soft, crumbling, or visibly deteriorated boards suggest more than a finish problem. If a screwdriver sinks more than 1/8 inch into water-damaged wood, treat the damage as structural. Don’t keep probing or pry up boards to investigate; note the location and describe the result during a professional assessment.
Compare suspect boards with nearby unaffected flooring. Differences in firmness, edge height, or surface texture can help show how far damage extends. A single visibly damaged plank doesn’t establish the condition of the subfloor beneath it, so include surrounding seams and transitions in your inspection notes.
- Track readings and avoid premature refinishing. Moisture readings can help identify whether dampness remains after the surface looks dry. Record the locations and compare readings over time, especially around stains, board edges, and the suspected leak path. Sanding wet or cupped flooring can worsen unevenness, so don’t begin refinishing based only on improved appearance.
Water damage restoration should address the source and remaining moisture before finish work. If stains fade but boards remain raised, loose, or soft, the floor still needs assessment. Keep photographs and readings together; that record helps distinguish drying progress from damage that continues to develop.
Tip Top Plumbing & Restoration: Water Damage Restoration
Tip Top Plumbing & Restoration provides water damage restoration for homes affected by leaks, overflows, or other water intrusion. Turn to the team when wood floors are wet, moisture may have reached the subfloor, or the leak source still needs attention. Water remediation and dry-out services address the water and drying process, while emergency plumbing can help with an active plumbing problem.
Once the affected structure is dry, a flooring professional can assess board repair or refinishing. If a leak continues or the source is unclear, addressing it is an essential part of protecting the repaired area.
Protect the Floor by Addressing the Source
The next decision is how to prevent the same moisture path from returning. For wood floor water damage repair in Plantation, coordinate the floor assessment with attention to the leak source. A repaired surface can be affected again if water continues entering from a plumbing problem or an unresolved line issue.
When the cause is plumbing-related, Tip Top Plumbing & Restoration offers emergency plumbing, sewer repiping services, and water heater repair and installation. Which service applies depends on the source of the water. Addressing that source alongside the floor damage helps create a more complete repair plan and gives the flooring professional a drier area to assess before refinishing.
Share the leak’s location, the affected rooms, and any changes you’ve observed in the floor when discussing next steps. A clear picture of the problem helps focus attention on both the water source and the materials it reached.
With the source addressed and the repair sequence clear, you can move forward with confidence.
Turn to Tip Top Plumbing & Restoration for Water Damage Restoration
Tip Top Plumbing & Restoration provides water damage restoration and water remediation for homeowners dealing with water-damaged wood floors in Plantation. If water has affected your flooring, the company can help with water remediation and dry-out services as part of the restoration process.
Contact Tip Top Plumbing & Restoration when you need help addressing water damage or locating a leak. Its services also include leak detection and slab leak repair, mold testing, and emergency plumbing.
Frequently Asked Questions
How can I tell if water got under my hardwood floor?
Raised board edges, widening seams, or a musty odor can indicate moisture beneath the hardwood. Check nearby thresholds and floor vents for changes, since water can travel beyond the original spill. A moisture meter can help assess concealed dampness, but one reading at a single spot may miss it. In Plantation, note whether symptoms continue into adjoining rooms, and share that pattern during an assessment.
How long does drying take, and when can repairs begin?
Drying may take 3-5 days for minor wood damage, while hardwood floors may need at least 7-14 days. Serious saturation can take weeks to months. Repairs should begin after the hardwood and subfloor are dry, with moisture readings supporting that decision. For example, a floor that looks flat may still have dampness beneath it, so appearance alone isn’t a reliable signal to start refinishing.
Repair or Replace?
Repair is more feasible when boards retain their strength and return to an acceptable condition after drying. Replacement may be needed when wood is structurally weakened, severely distorted, or deteriorated. If a screwdriver sinks more than 1/8 inch into water-damaged wood, treat the damage as structural. Before fitting replacement boards, NWFA guidance calls for them to have no more than a 2% moisture difference from the existing floor.
What pulls moisture out of wood floors?
Water extraction removes standing water, while dehumidifiers and controlled airflow help draw moisture from flooring and surrounding materials. Drying may also need to address the subfloor, because moisture trapped there can keep boards damp. Avoid relying on direct heat or a household fan alone to determine dryness. Professionals monitor moisture readings in affected materials, then use those measurements to judge when drying is complete.
What should I do right away after a spill or leak on hardwood?
Stop the water source if you can do so safely, then blot the spill and move wet rugs or belongings away from the floor. Photograph the affected area before cleaning changes its appearance. Don’t use a steam cleaner or sand damp boards. After a leak, contacting a professional within 24-48 hours can help address moisture before secondary damage develops. Keep a note of where the water spread.
Will homeowners insurance pay for water-damaged hardwood?
Coverage depends on your policy and the source of the water, so document the cause and damage before repairs change the evidence. A plumbing leak and water entering from outside may be treated differently. Flood coverage is also distinct: under the NFIP Standard Flood Insurance Policy, finished flooring isn’t among the specified covered basement items. Review your policy and ask your insurer how its terms apply to the documented loss.
What are the steps to repair water-damaged hardwood floors?
Start by addressing the water source and removing standing water. Next, document visible damage, extract remaining water, and dry the hardwood and subfloor under controlled conditions. Monitor moisture readings before deciding on flooring work. Once dry, assess whether boards can be repaired or need replacement. Finish work, including sanding or refinishing, belongs after drying, not during it. Keeping photos and readings together helps track the work from cleanup through assessment.
When can hardwood flooring be dried and refinished instead of replaced?
Refinishing may be appropriate when the hardwood remains structurally sound, dries fully, and has no damage requiring board replacement. Moisture testing should include the floor and subfloor before sanding begins. Wet or cupped boards can dry unevenly and become crowned if sanded too soon. The guidance cited for water-damaged wood recommends waiting one full season before refinishing, allowing the floor’s condition to be assessed over time.
Disclaimer
The information provided in this article is for general educational and informational purposes only and should not be considered professional plumbing, restoration, mold remediation, or legal advice. Every plumbing system, property, and situation is unique, and the recommendations discussed may not apply to your specific circumstances.
While Tip Top Plumbing & Restoration strives to provide accurate and up-to-date information, we make no warranties regarding the completeness, accuracy, or reliability of the content. Any actions you take based on this information are at your own risk.
Plumbing repairs, water damage restoration, and mold remediation should be performed by qualified professionals and in accordance with applicable local building codes and regulations. If you are experiencing a plumbing emergency, water leak, or property damage, contact a licensed professional for an on-site evaluation.
Tip Top Plumbing & Restoration is licensed and insured to provide plumbing and restoration services throughout Broward County, Florida.